• Skip to primary navigation
  • Skip to main content
  • Skip to primary sidebar
  • Skip to footer
  • Home
  • ABOUT
    • About Me
    • Policies
      • PRIVACY POLICY
      • DISCLAIMER & TERMS OF USE AGREEMENT
      • DISCLOSURE POLICY
      • COPYRIGHT POLICY
  • BLOG
  • Nav Social Menu

    • Bloglovin
    • Facebook
    • Instagram
    • Pinterest
    • Twitter
    • YouTube
  • ORGANIZATION
    • Organizing Projects
    • Organizing Process
    • Organizing Products & Tools
    • Habits & Routines
    • Productivity
    • Paper
    • Photos
    • Information
    • Kids and Families
    • Holidays
    • Preparedness
  • HOME DECOR
    • Decorating Project Gallery
    • Home Staging
    • Tips & Tricks
    • Home Improvement
    • Tools & Inspiration
    • Shopping Guides
  • DECLUTTERING
    • Decluttering Tips
    • Turn Clutter into Cash
  • CHALLENGES
    • The 40 Bags In 40 Days Declutter Challenge
    • The Organize and Refine Your Home Challenge
    • The 10-Week Digital Photo Organizing Challenge
    • The One Pile at a Time Paper Declutter Challenge
    • The Organize Your Holiday Challenge
  • SHOP
  • PRINTABLES VAULT
    • Become a VIP
    • PRINTABLE VAULT ACCESS
Refined Rooms logo.

Refined Rooms

Organizing, Decluttering & Home Decor Blog

HOW TO ACHIEVE THE PERFECT PAINT LINE

Decorate, Tips & Tricks

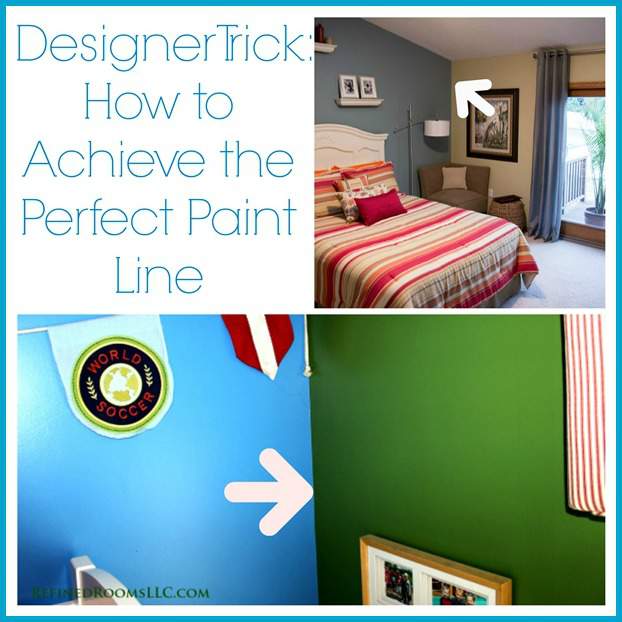
Ever wonder how professional painters are able to achieve a perfectly clean edge when they paint two adjacent walls different colors?

After attempting to create my first accent wall many years ago (which resulted in a big hot mess), I set out to find the technique that would allow me to replicate those pristine paint lines that pro painters are able to create. Is it the expert application of painter’s tape that separates the pro from the amateur painter?

Although painter’s tape plays a major role (no pun intended), there’s more to the technique than simply the use of tape. Today I’ll share this no-fail designer trick for creating accent walls that will have your friends asking, “Who’s your painter?”

Let’s assume that you have two adjacent walls, one of which you plan to paint blue and the other green. These are the steps you would follow:

  1. Paint the first color (Blue) and lap slightly onto the designated wall for the second color (Green).
  2. Allow the paint to dry for 1 to 2 days.
  3. Use a painter’s tape that is intended for delicate or freshly painted surfaces and tape the line where you want the Green color to begin. You should be taping over the edge of the Blue wall.
  4. Press down the tape’s edge firmly and paint over the tape’s edge ( where the Green color will begin ) with the Blue color.
  5. Allow to dry at least 4 hours.
  6. Paint over the tape’s edge with the Green color and continue to paint the remainder of the wall Green.
  7. Allow to dry and remove tape.


Perfect paint line demo

By painting over the tape’s edge with the first color, any bleed under the tape will not show and it also seal the tape’s edge. I’ve been using this technique for years now and it has always worked like a charm!

Got any painting tricks up your sleeve you’d like to share?

I luuvvv a good painting project! If you do as well, you may want to check out these posts:

Choose the right paint color every time by using this process @ refinedroomsllc.com An introduction to painting furniture with Annie Sloan Chalk Paint @ refinedroomsllc.com
 

Spraypainting Old Home Decor @ RefinedRoomsLLC.com


Learn how to stencil a wall like a BOSS with these stenciling tips and tricks | #DIY #Stenciling #wallstencil #focalwall

Ready to get epically organized?

Get access to 100+ printable pages to help you organize your home and life!

Welcome, Insider!! Look for a welcome email that includes the password for my free resource library full of organizational printables created just for my subscribers!! ** If you don't see it initially, please check your SPAM folder **

There was an error submitting your subscription. Please try again.

We won't send you spam. Unsubscribe at any time. Powered by ConvertKit

Leave a Comment

Previous Post: « What’s Behind That Door?
Next Post: Halloween Home Decor: The Best Sources for that “Spooky Chic” Look »

Reader Interactions

Leave a Reply Cancel reply

Your email address will not be published. Required fields are marked *

Primary Sidebar

LOOKING FOR SOMETHING?

Welcome!

Natalie Gallagher of Refined Rooms Blog.

I’m Natalie & I’ve never met a label maker I didn’t like!

I’m a former professional organizer who blogs about all things home organization and decluttering. I also share my great affection for home decor and productivity hacks here, with occasional DIY projects thrown in just for fun!  Learn more about my story here!

BECOME A VIP

GET ACCESS TO MY ORGANIZING PRINTABLES VAULT

PRIVACY POLICY
By opting in, you agree to receive my newsletter and ongoing resources. Unsubscribe at any time.

SEARCH BY CATEGORY

  • Bloglovin
  • Facebook
  • Instagram
  • Pinterest
  • Twitter
  • YouTube

Footer

DISCLOSURE

This site contains affiliate links for your shopping convenience (which means if you make a purchase after clicking a link I will earn a small commission, but it won’t cost you a penny more). Click here to read my full disclosure policy.

As an Amazon Associate, I earn from qualifying purchases.

COPYRIGHT

I love it when you share my tips, ideas and inspiration! Please keep in mind that all images and text on this site are the property of Refined Rooms, unless otherwise stated (regardless of whether photos are watermarked or not). Feel free to use one image, provided that a link back to my original post is included. Please do not remove any watermarks, crop, or edit any of my images without first obtaining written permission from me. All free printables are for personal use only. Pinning is always welcome and appreciated! Thank you!

Privacy Policy