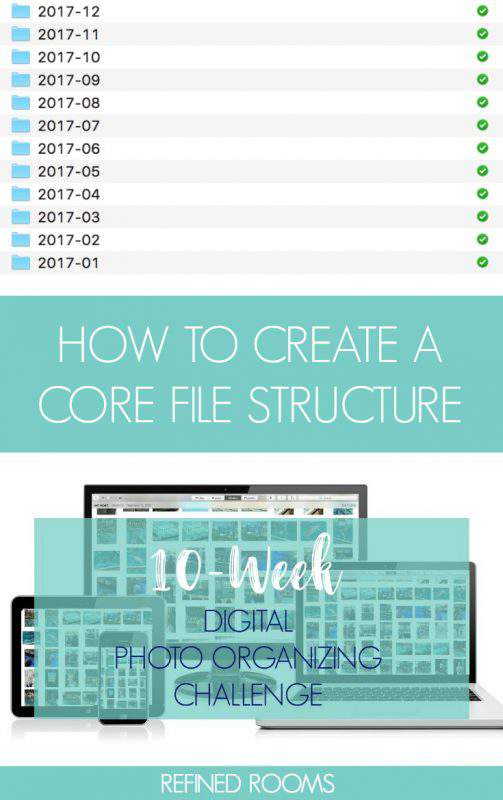
Welcome to Week 4 of the 10-Week Digital Photo Organizing Challenge! This week, it’s time to set up your digital photo core file structure within your hub.
If you are new to the Challenge, be sure to read through and complete the challenge assignments for the previous weeks. In week 1, we selected a location for your digital photo hub (the “master” folder where all of your digital images are eventually stored). We took an inventory of your digital photo collection in week 2 to determine the number of images and size of your photo hub before beginning the organizing process. And last week, we put an initial photo back-up system in place.
So far, all of these assignments have set the stage for the nitty gritty organizational work. Starting this week, it’s all going to start coming together as you learn about the magic that is a digital photo core file structure!

WHAT’S A DIGITAL PHOTO CORE FILE STRUCTURE?
The core file structure is basically the framework or “skeleton” of your digital photo organization system. It’s a set of nested folders created directly within your computer’s operating system (either a PC or a Mac) that represent the chronology of your digital photo collection.
WHY USE A DIGITAL PHOTO CORE FILE STRUCTURE TO ORGANIZE MY PHOTO COLLECTION?
Using a core file structure system is considered a best practice among photo organizers because it creates an organized photo collection that is universally “portable”. A portable system is neither operating system- or software-dependent, so it offers you the greatest flexibility as you move forward.
I’ve heard many a horror story about people who’ve used various photo organizing software programs to organize their photos, then later on, “lost” all of the organization they had spent countless hours putting into place, because they switched from a PC to a Mac, or vice versa (or their software organizing program was no longer available).
HOW DO I CREATE A DIGITAL PHOTO CORE FILE STRUCTURE?
The top level of the core file structure contains folders for each year (the name of the folder should be the 4-digit YEAR). For example, I first started taking digital photos in 2003 (the year my daughter was born, coincidentally!), so my top level structure looks like this:

You’ll notice in my file structure, I have a few theme-specific folders in addition to my yearly folders. One folder is designated for images that have been created from scanned print photos that require a date correction in the meta data before I can sort them into the correct yearly folder.
Other folders are for images that I’d like to keep separate from my regular photo collection (e.g., digital images of my kids’ art projects, and inspiration photos for several future home improvement projects). I also keep family videos separate from photos. As you start to create your own core file structure, think about whether you might have some similar “theme-specific” folders that might make sense for you to have as an addendum to your basic yearly folders.
Drilling down to the next level, each 4-digit YEAR folder in your core file structure should contain 12 MONTHLY folders. When you create your monthly folders, use a “YYYY-MM” folder name format, in which each month is represented by a 2-digit number (e.g., July 2017 will be named “2017-07”). Using this naming convention will allow you to easily sort a year’s worth of photos in chronological order.

You can choose to include the name of the month within the folder name (e.g., 2017-07-JULY), but be sure the month name comes after the 2-digit month number.
In addition to the monthly folders, I suggest creating a “To Review” folder within each yearly folder. This gives you a place to temporarily store any photos that have wonky “date created” fields that you come across in the sorting process until you have time to correct this issue.
Begin by creating a single year folder, and the 12 monthly folders within it (+ the “To Review folder”). Once you’ve got that initial folder created, use your copy/paste/rename computer functions to quickly create the folders for the remainder of your core file structure.
If this feels like a bit of a time-consuming monotonous task, that’s because it is. But fear not! You can download a pre-made core file structure template within the Digital Photo Organizing Tool Kit, which I’ve created as a companion resource for DPO Challenge participants. Just enter your information in the form below, and the Tool Kit will be sent straight to your inbox!
Your Assignment for Week 4 – Create a Core File Structure:
- Create your custom core file structure for your digital photo collection (creating a set of yearly folders to cover the span of time for which you have taken digital photos). Use the folder naming conventions outlined above. If you sign up to receive the Digital Photo Organizing Tool Kit, you can simply download a pre-made core file structure template!
- Add any theme-specific folders to store images that you’d like to keep separate from your main photo collection.
Be sure to return later in the week to let me know about your progress by leaving a comment below!
—————————————————-
This post is part of the 10 Week Digital Photo Organizing Challenge
Just stumbled upon the Challenge? Read the Digital Photo Organizing Challenge intro post first. Here’s what to look for in the coming weeks:
- Week 1: Create a digital photo Hub
- Week 2: Create a digital photo inventory
- Week 3: Create a digital photo backup system
- Week 5: Sort your digital photos
- Week 6: Remove duplicate digital photos
- Week 7: Rename digital photo file names
- Week 8: Tag & rate your digital photos
- Week 9: Create a digital photo maintenance plan
- Week 10: Celebrate and share your digital photos
See you back here next week!
Photo © Deposit Photos@ Shtanzman
- Printables for Organizing Home & Life: The ULTIMATE Organizing Printables Vault! - November 28, 2023
- Clipboard Wall Organization for Papers: Easy DIY Paper Storage! - September 4, 2023
- How to Plan a Graduation Party to Remember: The Ultimate Graduation Party Planner - May 9, 2023

Becky Johannes says
Just came across this article. I actually started scanning our pictures a few years ago but when we moved it got put on the back burner. I’m going to start working on this project again and I think I might change a few if the ways I was doing mine.
Natalie Gallagher says
That’s awesome Becky! I’m always happy to hear when the DPO Challenge spurs someone into action!
Kristy says
My progress is going very slow. I actually attempted to start last summer, delayed till October and had a very hard time with STEP 1!!!! 🙂 Probably the reason I put it off so long. I really love this process even with the uber attention to detail (not my forte’) but appreciate this resource so much!
Natalie Gallagher says
The process is simple…but NOT easy 🙂 Keep pressing on Kristi!
Deanna says
Hi there! I just stumbled upon this great article! I’m just starting the process. Would you recommend this core file structure happen right in photos on my Mac or somewhere else? Thanks.
Natalie Gallagher says
Actually, I recommend creating the core file structure directly on your computer’s hard drive (or your External harddrive). Although I love Photos for Mac for completing photo projects (like photo books), it’s a proprietary software that requires you to import and export your photos. So if one day you decide to move from Mac to PC, those image files need to all be exported out of Photos first before they can be imported anywhere else. Does that make sense?
Andi Willis says
It’s taken me a long time to get my file structure and naming structure down. I think I’ve finally got it and boy, does it make things a lot easier. Really enjoying your series!
Natalie Gallagher says
I can’t agree more Andi. Once you’ve got those 2 pieces nailed down (file structure and consistent naming convention), it only takes a nanosecond to locate ANY photo in your collection…like magic! I’m so glad you’re enjoying the series 🙂