In a previous post, I described the organization component of my daughter’s recent bedroom makeover. It basically involved overhauling her closet with the installation of a customized Elfa closet storage system. Today, I’ll reveal how the decor of the bedroom was updated in an effort to transform the room into a space she can truly enjoy throughout her teen years.
This post contains some affiliate links for your convenience. Click here to see my full disclosure policy.
When we moved into our home 9 years ago, my daughter was almost 2 years old, and I thought it would be fun to involve her in the process of decorating her new room. I allowed her to select the paint colors of the room and celebrated her love of sea creatures by creating a homemade stamped “sea life” border around the perimeter of her room.

ROOM ISSUES
Although there are many aspects of the room that have stood the test of time beautifully (e.g., the furniture), there was room for improvement on several fronts. First, the bedroom was dark as a consequence of the magenta paint color and the window treatment.
Second, the green wall color choice was less than optimal (remember, it was chosen by a 2-year old after all). It’s difficult to appreciate how jarring the neon green walls were by merely viewing these photos. Although Grace really enjoyed it, the color was headache-inducing for me to say the least. And after 8 years, it was time to bid adieu to the cute crabs and octopi.
In addition, it was becoming increasingly apparent that my little trinket collector would require more display space than one 12″ x 12″ bulletin board would accommodate.
Finally, we needed to address a few furniture placement issues and replace the bedding, since (although cute), her 5-year quilt had seen better days.
REDESIGN OBJECTIVES
So in a nutshell, the design objectives for this room were to:
1. Lighten and brighten
2. Tone down the neon
3. Create additional display space
4. Improve room Flow
5. Remove “Little Kid” elements
6. Freshen up bedding
7. Add fun pops of color
Drumroll please…may I present the new and improved “Big Girl” Room!
Objectives 1, 2, and 5 were achieved via painting the walls and replacing the old valence with a new one that’s narrower and mounted close to the ceiling line. I chose to paint over the magenta using the white trim color in order to unify the chair rail and the bottom portion of the wall. We said farewell to the neon green walls and painted over it with a softer, fresher shade of green.
In order to achieve Objective 3, I created a display wall by covering several cork bulletin boards with magenta-colored fabric that I scored from the remnant bin at Joann’s. My daughter wanted to add cork to the entire wall, but I thought that this would be more than sufficient. We relocated her original bulletin board to the interior of her closet.
The room flow was improved by switching the original position of the vanity and bookcase. In the original configuration, it was difficult for my daughter to access the far side of her room because there was insufficient clearance between the bed and the vanity. With this simple repositioning,Objective 4 was met.
Now for the fun part! After an extensive search for bedding, my daughter and I fell in love with this funky and colorful duvet/sham set. The bed skirt was a clearance find, and works so well with the duvet cover. Love love love it! Objective 6…CHECK!
Of course, the addition of the colorful bedding helps to achieve Objective 7, but we took it to the next level with the addition of the fun paper lanterns and ribbon in a variety of festive patterns and colors. We couldn’t resist these cute vinyl picture frames that offered a perfect dose of magenta “pop” on the bookcase wall.
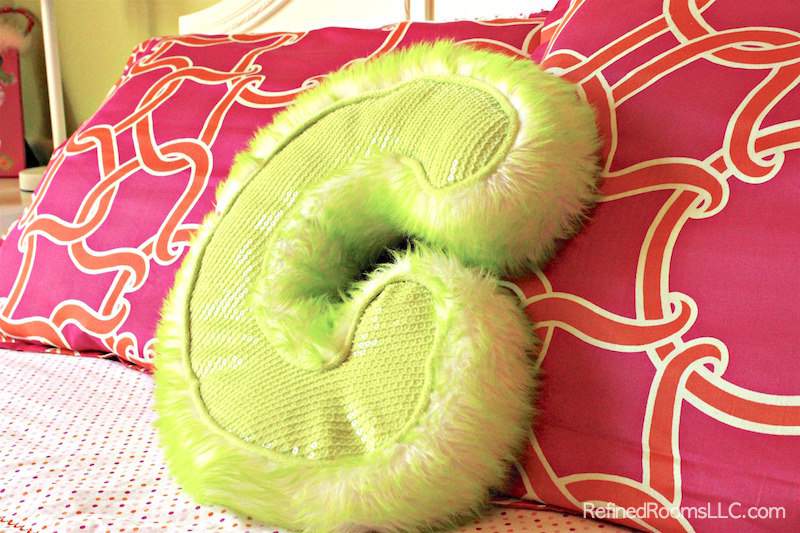
And for the grand finale, we spray painted the letters to match her funky new duvet cover. There you have it! One last look at the Before and After…
I’m hoping that this will be the last time we will need to decorate this space until it’s time to transform it into my craft room once Gracie goes off to college!
SOURCE LIST
- Wall paint – Glidden’s Calabash, eggshell finish
- Trim paint – Glidden’s Antique White, semi-gloss finish
- Duvet cover & shams – Amazon
- Bed skirt – Tuesday Morning
- Sheet set – Amazon
- Headboard/dresser/bookshelf/vanity table – Target {similar line}
- Custom window valence – Smith+Noble
- Paper lanterns –Paper Lantern Store
- Bulletin board cork board – Amazon
- Bulletin board fabric – Joann’s
- Lamp – TJ Maxx
- Vinyl wall frames – picked up in a local specialty shop on vacation!
What’s your favorite part of the room redesign?
Check out our whole home redesign progress to date in the My Home Refresh Series:
- Printables for Organizing Home & Life: The ULTIMATE Organizing Printables Vault! - November 28, 2023
- Clipboard Wall Organization for Papers: Easy DIY Paper Storage! - September 4, 2023
- How to Plan a Graduation Party to Remember: The Ultimate Graduation Party Planner - May 9, 2023
Cynthia Walker says
I just Love your girl room makeover! Absolutely stunning. It must be pure heaven to wake up in the morning to such beautiful surroundings. I think it’s really important to have a relaxing and peaceful bedroom. To wake up every morning surrounded by a really fresh and transformed room must be a great way to start your day !! Well done.
DazzleWhileFrazzled says
LOVE this room! My daughter (6) would love the little makeup/dressing stand and I absolutely love the paper lanterns. This will grow with her through her leaving for college. Great job! Visiting from Share It One More Time party.
Natalie Gallagher says
Thank you so much! Yes, that was definitely my goal…creating a space that be just as loved when she’s 18 as it is when she’s 12!
Rebecca says
Very cute room makeover. I love how it turned out. We are in the process of redoing my 10-year-old’s room and going through some of the same things. It’s amazing how much stuff she has that she wants to display. Thanks for sharing how you did your room. It’s great inspiration.
Natalie Gallagher says
Thanks so much Rebecca! My daughter is close in age to yours, and she’s a collector/”displayer” as well. Believe me, there was a lot of decluttering that happened before I shot these photos! Best of luck with your project.
Mandy Gostlin says
Oops, one more question. I know I asked you this before, but I can’t find your answer. Where did you buy those cute paper lanterns?
Natalie Gallagher says
Mandy,
I purchased them online at http://www.paperlanternstore.com. They were really inexpensive and come in a huge variety of colors and styles. Be sure to send me a photo of your room once you’ve finished it.
Cheers!
Mandy Gostlin says
love!! How did you hang the paper lanterns?
Natalie Gallagher says
Hi Mandy!
Thanks for stopping by the blog. I actually used clear push pins to secure the ribbon to the ceiling (gross grain ribbon tied to each lantern).
Darla at. HeartWork Organizing says
Love it! The paper lanterns are my fave, of course. Pinning!
Natalie Gallagher says
I’m glad you love it Darla! Thanks for stopping by the blog and for the pin 🙂
I have to say that the paper lanterns are my favorite as well, and the least expensive component of the redesign…