So whose ready to get this Paper Declutter Party started? We’re going to start by organizing mail. Whose in?!?
This post contains affiliate links for your shopping convenience (which means if you make a purchase after clicking a link I will earn a small commission, but it won’t cost you a penny more)! Click here to read my full disclosure policy.
What better place to start than with the mail? Dealing with the mail can be overwhelming for many of us because it represents a never-ending, constant influx of paper that arrives DAILY. The first step in managing the mail is to decrease the volume of it. You can drastically reduce the amount of junk mail/paper bills you receive by following these tips. The less you have coming in, the less you’ll have to manage!
ESTABLISH A MAIL MANAGEMENT SYSTEM
Every household needs a system for managing the mail; if you don’t already have one, you will by the end of the week! Your mail management system should include the following:
- Recycle bin
- Shredder
- “To Be Shredded” Bin (optional)
- Inbox
- Action File
Below, I’ll share my system, and describe how it can be customized to suit your needs/preferences.
I retrieve my mail from the mailbox and sort it on a daily basis. I do recommend doing this daily, since it prevents you from being overwhelmed with a large amount of paper to sort through. If that is just not realistic for you, aim for 2-3 times per week.
Sorting
As I walk from the mailbox to the house, I’ve got some time to kill:

During the walk, I complete a “pre-sort” using three categories:
Credit card applications, and any mail that likely contains account numbers or other information that I prefer not to get into the hands of an identity thief goes in the “Shred” pile. All other unwanted mail (e.g., flyers, political ads, catalogs, solicitations from charities) goes in the “Recycle” pile. What’s left becomes my “Keep” pile.
As I enter the house through my garage, I promptly toss the “Recycle” pile into my paper recycling bin. You can see it below, on the shelf to the left of the door.
In an ideal world, the recyclable junk mail never enters your home (check out my Monkey Bars garden tool storage rack in the background, still going strong one year later!). If you enter your home from a garage, find a place for your paper recycling to live inside the garage.
Once inside, I avoid the temptation to dump the mail on the nearest counter top, and instead, bring it over to the area in the kitchen that I’ve designated as my mail processing center (which is part of our household command center).
Start brainstorming where your mail processing center should live. The location should be close to where you find yourself typically dumping paper when you enter the house. Common places include the kitchen, mud room, or front entryway.
If you don’t have a garage, you’ll need to carve out a space for paper recycling within your mail processing center.
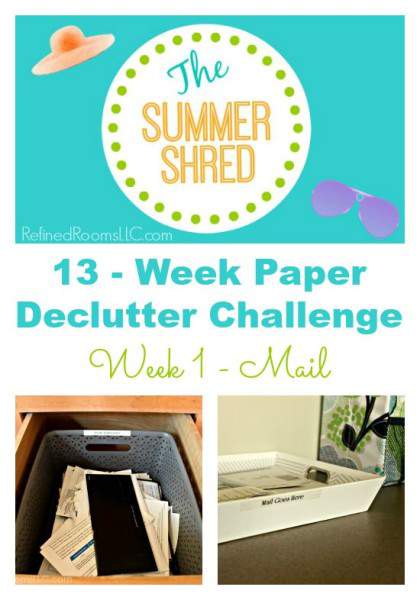
Next, items in the “Keep” pile are placed in the Inbox. Just like your Inbox at work, your home Inbox is the central location where all unsorted paper should be placed until you designate a time to sort it. The Inbox that I use is fairly small, since I choose to sort and empty it daily.
The size of your Inbox should be at least 9″ x 12″ to accommodate regular-size paper laid flat. If it will be stored out in the open, you’ll want to choose a container that fits well with your decor, so you won’t mind seeing it all of the time!
Notice the label? It never hurts to include one as a reminder to yourself, as well as other members of your household. I’m huge believer in the power of labels to maintain your household organization systems.
If you prefer to let your paper accumulate for a couple of days before sorting it, then you might opt for something larger, like these.
You can handle your “To Shred” pile one of two ways. The first option is to shred the items in that pile immediately (having a shredder close to your mail processing center is ideal). Most people I know prefer to batch process their shredding and simply collect it in some sort of “To Be Shredded” container until the container is full, then shred it all at once. That’s my preference. So my “To Shred” pile gets dumped here.
If you don’t have sufficient space for a container, you can place your mail to be shredded in a “To Shred” file located within your action file. What’s an action file? So glad you asked.
Paper Processing
The next step in the process is to empty your Inbox by sorting those “Keep” items into a container, based on what you need to do with each piece of mail next.
This container serves as your action file. It can take the form of a basket containing file pockets, a binder, or a desktop file box with hanging files (my preference). I use a Thirty-One Fold N’ File tote for this purpose (cute, eh?).
As you can see, the categories I’ve created in my action file for my mail (and other sources of paper coming into my home) include:
- Forms to Complete
- Bills to Pay
- For Others (papers that need handed off to someone else)
- To Scan/File
- Enter in Calendar
- Receipts
Customize your action file based on the categories of paper that come into your life. The best way to come up with your categories is to sort the incoming mail, asking yourself the magic question:
“What do I need to do NEXT with this paper?”
You will likely come across mail items that fall into the category of “To Read”. I don’t advise putting “To Read” items in an action file, since this category of paper is rather bulky. Instead, gather your “To Read” items in a central place in your home where you typically like to read, and designate a container in your reading spot for these items.
Here are a few more examples of basic desktop file boxes that would be suitable for creating an action file.
Here I am in action (no pun intended), emptying the contents of the Inbox into the appropriate file in my action file container.
Bills to pay:
Events to be entered into the calendar:
The final step in the process is to designate a regular time for processing the items in your action file. During this session (which I lovingly call my Paper Administration Appointment), you need to pay the bills, complete the forms, scan/file reference papers, enter activities in your calendar, etc. The objective is to empty the action file. You see, once you’ve completed the action associated with that paper, it either becomes fodder for the recycle bin, or it moves from an “action item” to a “reference item” and needs to live elsewhere (we’ll address reference papers in Week 2 and Week 3).
If you have not yet read the overview of the challenge, do that first before proceeding to this week’s assignment.
Your Assignment for Week 1: Organizing Mail
1. Complete the steps outlined in the paper reduction blog post to reduce the volume of incoming mail
2. Establish a mail management system by:
~designating a location for paper recycling
~ designating a location for mail to be shredded (or begin shredding items as they come in)
~ designating an Inbox for your “Keep” pile
~ creating an action file to sort papers into from your Inbox
~establishing a weekly Paper Administration Appointment and entering it in your calendar (and sticking to it!)
I want to hear about your progress and field any questions you may have!
——————————-
This post is part of the 13-Week Summer Shred Paper Declutter Challenge
Just discovered the Challenge? I invite you to read the Challenge Overview post first. You can then begin to work your way through the weekly Challenge assignments below:
Week 1: Mail
Week 2: Handy Reference
Week 3: Long-Term Reference
Week 4: School Papers
Week 5: Kids’ Art
Week 6: Memorabilia
Week 7: Manuals & Warranties
Week 8: Catalogs & Magazines
Week 9: Receipts
Week 10: Business Cards
Week 11: Lists & Notes
Week 12: Recipes
Week 13: Coupons
~ Happy paper decluttering!
- Printables for Organizing Home & Life: The ULTIMATE Organizing Printables Vault! - November 28, 2023
- Clipboard Wall Organization for Papers: Easy DIY Paper Storage! - September 4, 2023
- How to Plan a Graduation Party to Remember: The Ultimate Graduation Party Planner - May 9, 2023
jamesrod214 says
This is a great challenge! It’s something that will help me get the clutter out of my living room. In my house we usually just throw the mail on our window sill. I like your five steps to managing mail. I’m going to be better at document shredding from now on.
Natalie Gallagher says
So glad you are inspired by The Challenge…I wish you the best on your paper organization journey. Come back and let me know how you are progressing in a few weeks
Autumn Leopold says
Love the way you simplified this process! We have been talking about paper/mail on my Facebook page so I will be sharing this and I am sure it will help people get started! Just the post I was looking for! Looking forward to the rest of the series! 🙂
Natalie Gallagher says
Thanks so much Autumn! I’ll check out your FB page to see what tips I can learn from you as well! Thanks so much for sharing The Summer Shred Challenge with your readers.
Natalie Gallagher says
Hi Sarah!
Yes, I am a huge fan of Thirty-One products, and was so excited when they came out with the Fold and File (a filing box that’s cute…go figure!). Thanks for stopping by the blog!
Sarah Soboleski says
What a neat post! I love how you walked us through your mail processing system step by step. How smart the junk mail never enters your house. I also have a Thirty-one file bin that I use. Those mesh pockets in the front are great.