The reveal for my home office redesign will be coming very soon, but before I offer up those before/after photos, I wanted to chat a bit about a D.I.Y. “power house” product that I finally had the opportunity to try…Annie Sloan Chalk Paint! As awesome as this product is, there’s a bit of a learning curve that takes place when you first use it. If you’re considering using this product for an upcoming DIY project, I’m sharing my Annie Sloan Chalk Paint tips for beginners to help you achieve great results with your furniture painting project.
This post contains affiliate links for your shopping convenience (which means if you make a purchase after clicking a link I will earn a small commission, which helps keep my blog up and running but it won’t cost you a penny more)! Click here to read my full disclosure policy.
It’s not for lack of interest that I haven’t yet worked with this much-celebrated paint. I was just waiting for the perfect project to come along. Well, that perfect project finally surfaced when it was time to tweak my home office as part of our global home redesign project.
A few years back, I purchased the Martha Stewart Ingrid Desk and matching file console for my home office. Although I absolutely love the lines of this furniture, as well as the quality and functionality of the pieces, the color just didn’t hit the mark.

The rubbed ivory color read just a bit too yellow for my liking.
Since the day the set arrived, I’ve always had it in the back of my mind that I would paint it someday. Well, that “someday” finally arrived late last month.
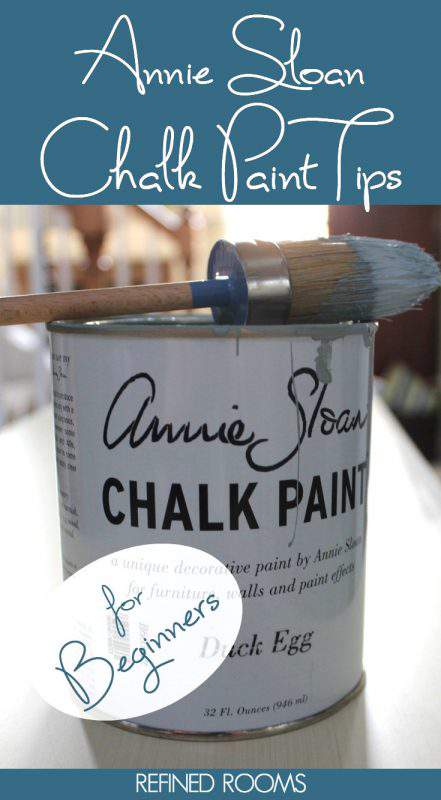
In case you aren’t familiar with the new paint craze that’s sweeping the world, Annie Sloan Chalk Paint is a decorative paint that is made specifically for those of us who need instant gratification. Among it’s amazing qualities is the opportunity to avoid the tedious prep work that typically comes with painting furniture and other surfaces. To quote Annie herself…
“There’s no need for tiresome priming and sanding – you can get straight to the fun bit!”
The Annie Sloan chalk paint system actually consists of two components: the chalk paint, and a protective wax top coat that’s applied after the paint dries (you can choose to use either a clear wax or a dark wax).
In preparation for my furniture painting project, I took a class on how to paint with chalk paint earlier this year. Of course, by the time I got around to completing the project, I pretty much forgot everything that the class instructor taught me. No matter! The big takeaway from this project is that this paint is amazingly forgiving.
I learned through trial-and-error how to best work with the paint to achieve the look I was aiming for. I did learn a few lessons along the way that I’d like to share with you.
USE PAINT + WATER FOR A SMOOTH COAT
If you are the impatient type like me, you’ll love the lightning fast drying time of this paint. The fast dry time, however, poses a bit of a challenge when attempting to cover a large, flat surface area, like the top of a desk. I found that by dipping my brush in a small bowl of water before dipping it into the paint, I was able to maintain a wet edge.
Cutting it with a bit of water also resulted in a much smoother finish. Don’t be alarmed if your first coat looks like the image below. All will be right with the world once that second coat is applied!
See, I told you! As you can see on the drawers, after the second coat of paint was applied, I was left with a really pretty matte finish {if you’re wondering what this gorgeous color is, it’s called Duck Egg}.
THE MAGIC LIES IN THE WAX
I really liked the transformation of the furniture once the paint was applied. Little did I know how much I’d fall head-over-heels in LOVE with the pieces, once the wax finish was applied. Wowza!
It’s challenging to capture the finish difference in an image, but hopefully, you can see the difference between the unwaxed portion of the drawer {right} and the portion that has been waxed {left}. The wax doesn’t change the color, but instead, deepens and enhances it.
Here’s another attempt to show you the the contrast between the waxed and unwaxed finish (please excuse the paper plate, which I used to hold the wax):
A LITTLE GOES A LONG WAY!
I was shocked to see how much paint and wax that remained after I completed the project {desk + console}. I had approximately half a can of Duck Egg left, even taking into account an accidental spill. In doing my research, I learned that a quart of chalk paint should cover around 150 square feet. Good to know! That’s about twice the coverage of your average latex paint. This knowledge does help justify the steep price tag.
Ready to see the finished product? Thought so…
I was pleased as pie when I placed the lamps and accessories back. So pretty!
Bye Bye Rubbed Ivory…Hello Gorgeous!
The Duck Egg color is such a pretty contrast with the spring green accents in the room…
I was tempted to do a bit of distressing around the edges, but my impatience won over and I decided to be content with the non-distressed version.
…and one more shot of the console for good measure. I just love how the new color plays so nicely with the brushed nickel accents in the room now, don’t you?
Now that I’ve used Annie Sloan Chalk Paint, I can’t imagine using anything else when it comes to future furniture painting projects. I’m sold!
I invite you to join me on my home redesign adventure by checking out some of the other posts in the My Home Refresh series, and let me know in the comments below if theses Annie Sloan Chalk paint tips for beginners was helpful.
- Printables for Organizing Home & Life: The ULTIMATE Organizing Printables Vault! - November 28, 2023
- Clipboard Wall Organization for Papers: Easy DIY Paper Storage! - September 4, 2023
- How to Plan a Graduation Party to Remember: The Ultimate Graduation Party Planner - May 9, 2023
Sarah A. says
I don’t have much experience with painting so this was really helpful! Especially when it comes to chalk paint. The first time around I dripped paint everywhere and walked over my carpet and ended up needing a carpet cleaning. The paint also ended up streaky. I removed the paint, got a carpet cleaning, took a breath (lol), and started over. I found your tutorial and it made all the difference. I painted a hutch that now sits in our living room. Thanks for the tips!
Natalie Gallagher says
you’re welcome!
Jiselle Greene says
Yes! I agree the green is a lovely upgrade. It really pops in both of the rooms!
Jiselle – buckeyearizonapainters.com
Michelle Dickstein says
The furniture looks amazing! I have a table and chairs set I would love to use chalk paint on to refresh the look (once my kids are a little older and no longer in “destroy” mode when it comes to mealtime). Your post is giving me the courage to give it a shot!
Natalie Gallagher says
Thanks for the thumbs up! Yes, I totally get it. You don’t want to waste too much energy on home decorating when there are little ones who quickly will undo all of your hard work. My kids are 10 and 12, and I still have this issue, LOL!
Sandra says
Wait until they hit their “teen” years. You ain’t seen nothin’ yet!
Natalie Gallagher says
Sandra,
Are you referring to the furniture pieces?
Autumn Leopold says
Thanks for the post Natalie! I have been waiting to try mine on an antique desk I found! I was intimidating by all of the steps but you made it look easy! Beautiful color palette too!
Natalie Gallagher says
Awesome Autumn! Please post pictures after you’ve completed yours. Can’t wait to see it. You truly can’t go wrong with this paint
Linda at Mixed Kreations says
Turned out beautiful! Love the color that you chose, and I love the matching lamp shades. I have painted a few pieces of furniture with the Anne Sloan chalk paint and love it. Thanks for sharing!
Natalie Gallagher says
Thanks so much Linda! Do you feature any of your pieces on your blog? If so, I’ll have to come over and check it out. In your opinion, what’s the best feature of Annie Sloan paint? You’ve got a bit more experience than I do…
Ellen Delap says
Wow! Love this step by step approach! What a darling piece you created!
Natalie Gallagher says
Thanks Ellen!
Sabrina Quairoli says
Wow! This looks beautiful. Where did you buy the paint/wax? I want to try this project with an end table I have. It’s a darker wood. Would I have to sand it to remove all the stain? Any other suggestions would really help. Great photos too.
Natalie Gallagher says
Sabrina,
I actually purchased the paint/wax from a small local consignment store that actually transforms dated furniture pieces into really cool, updated pieces that they sell in their shop. Annie Sloan products can only be purchased from small locally based shops that are carefully selected. Here’s a directory of “stockists” that you can search: https://www.anniesloan.com/stockists/#/ The beauty of this paint is that there is absolutely no sanding or other prep work required…just give the piece a good cleaning and then begin! That’s why I love it so!
Janet Barclay says
This is simply gorgeous! Your furniture looks much more “upscale” now – and distinctive!
Natalie Gallagher says
Glad you like it as much as I do Janet 🙂
Seana Turner says
Wow, that really came out beautifully! I love the color… and the lamps and silver frames make for a beautiful scene. Want to come over and decorate my house:) ?
Natalie Gallagher says
If you lived closer Seana, I might just take you up on it. Thanks for the compliment!
Kathy Vines says
Wow! That is a gorgeous finished product! Thanks for walking through the steps so well…. *almost* makes me want to try this myself!
Natalie Gallagher says
Thanks Kathy! Painting furniture is very therapeutic…I highly recommend it!